This chapter demonstrates the detailed process of workflow creation with an example of sales order.
Make sure you have completed the following preparations.
- Complete the organization structure with correct companies, departments, posts and personnels.
- Create object templates, instances and their attributes, services and events.
- Make sure object instances are bound with correct data sources.
Creating Related Pages
Create pages that relate to your workflow, and make sure to link them during workflow creation.
- In the application, click Interface Design.
- Add a new page
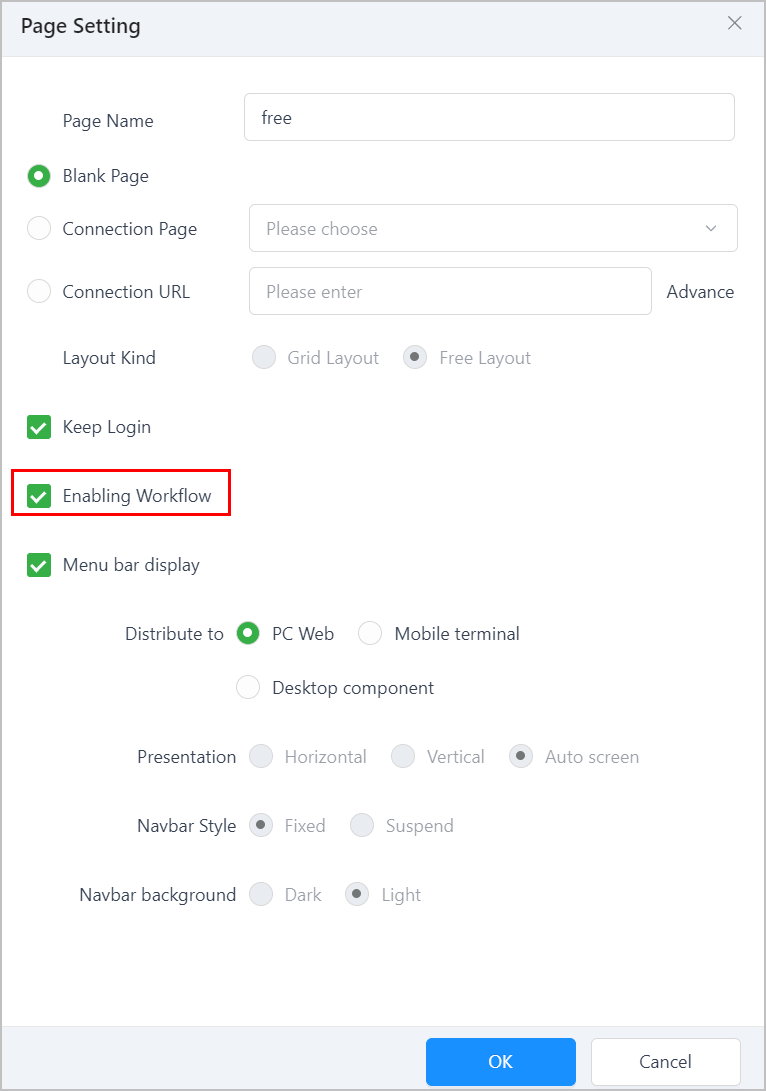
Check Enabling Workflow checkbox to link the page in the workflow.
- Design the page and then save it.
Creating Workflow
Draw a workflow to demonstrate actual business flow with related pages and personnels.
For details of each node provided by supOS, see Element Description.
- In Business Designer, click the Workflow Management tab.
- Click New, enter workflow information and then click Confirm.
- Click the Start Event icon, and then select nodes from the left side to draw your workflow.
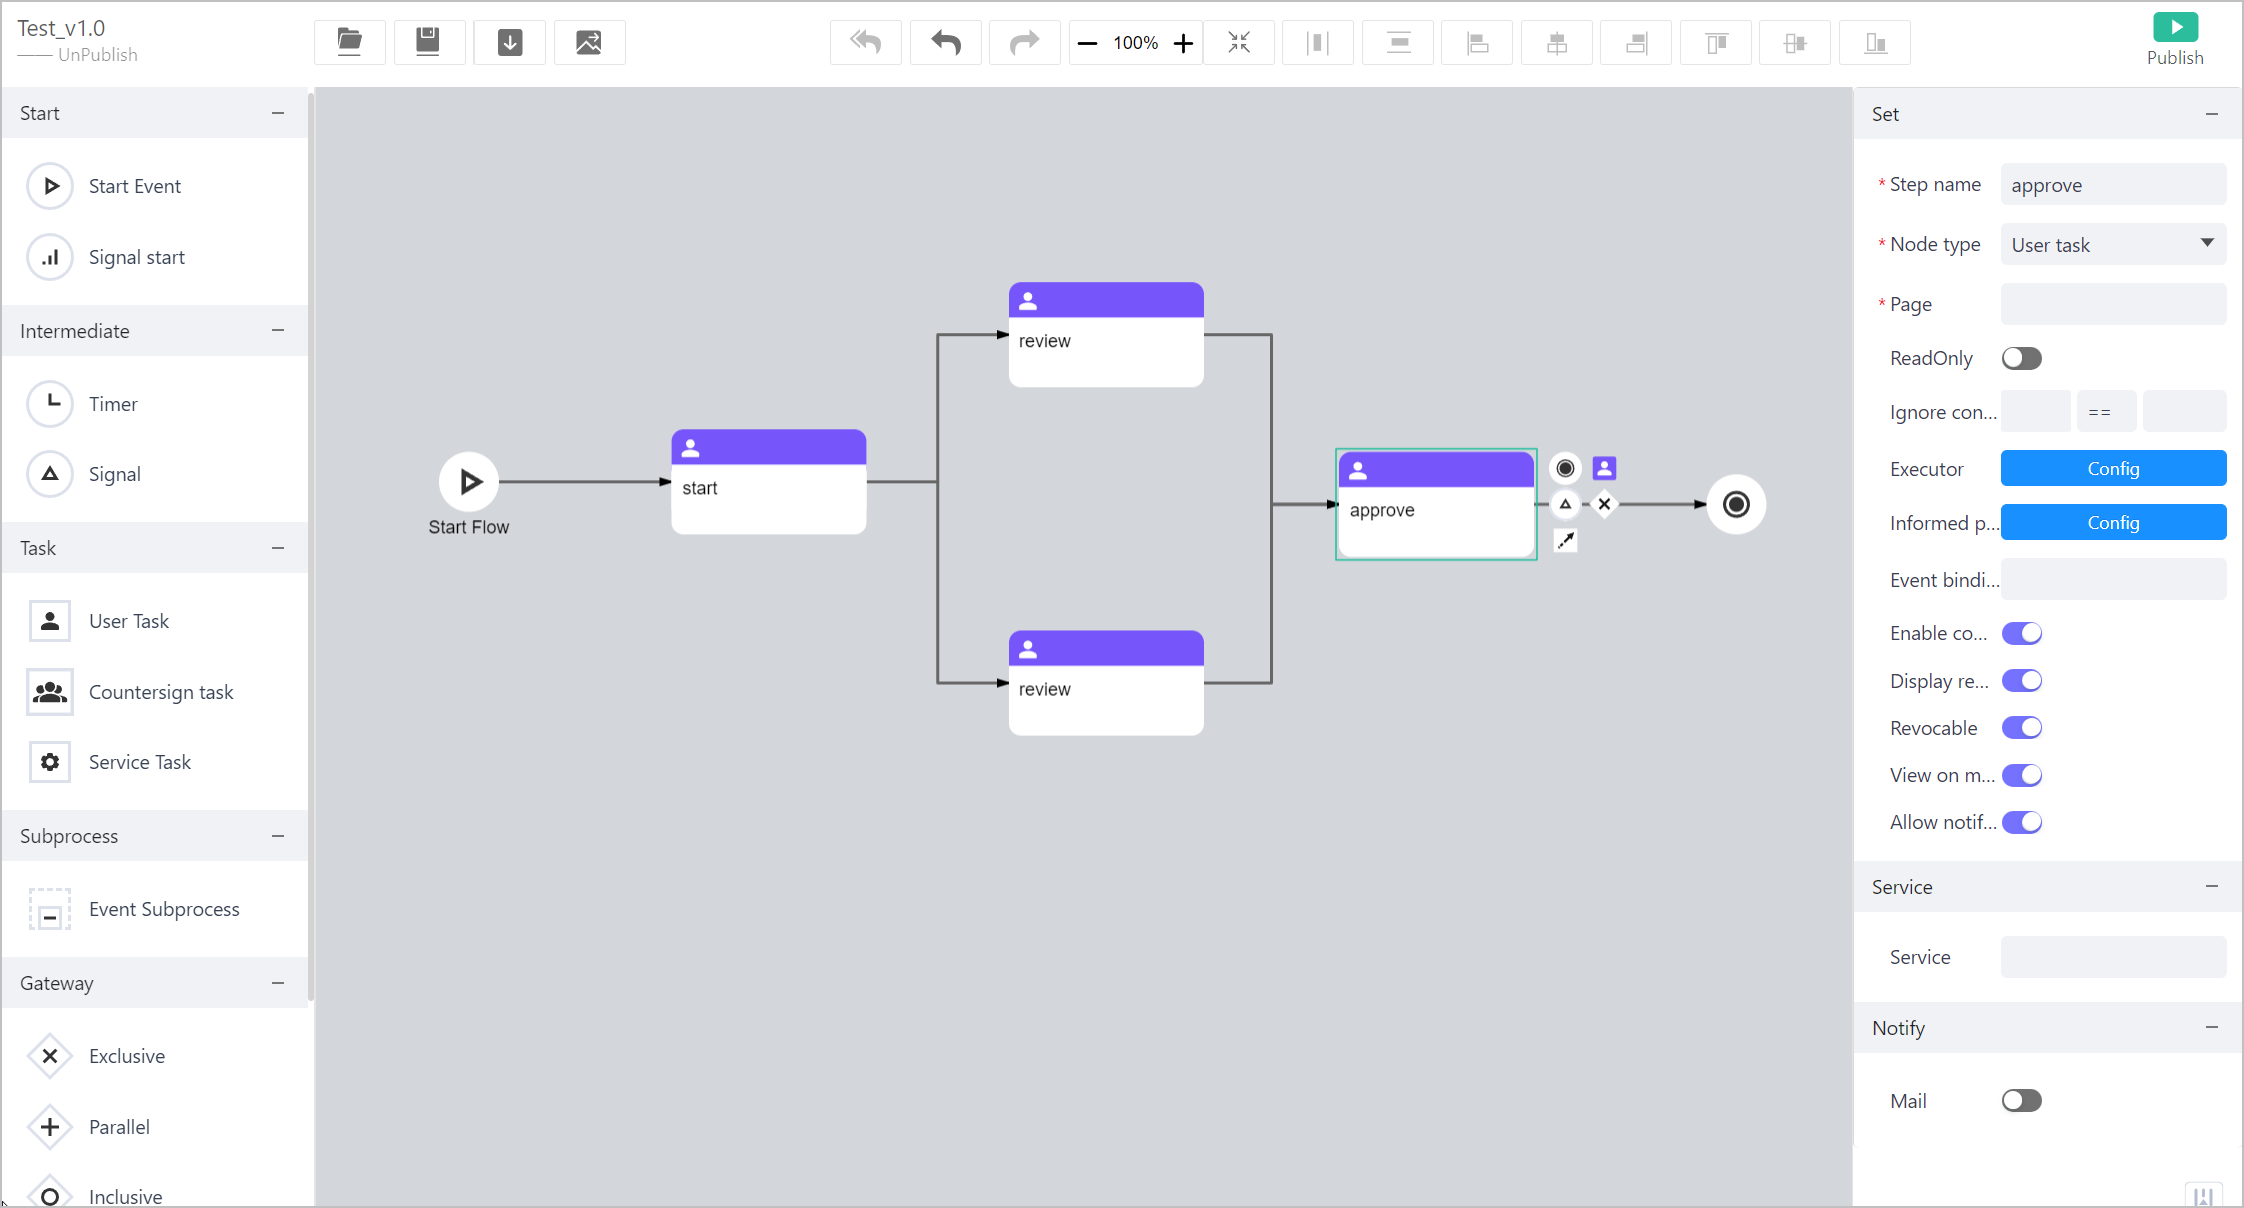
- Click
 next to the last step to end the workflow.
 - Click Publish at the upper-right corner.
To edit a published workflow, you need to upgrade it by clicking Upgrade at the upper-right corner.
Creating Workflow Page
Create another page to which the workflow applies.
- In Business Designer, click
 to add a new page.
Make sure to check Enabling Workflow checkbox to be able to link a workflow.
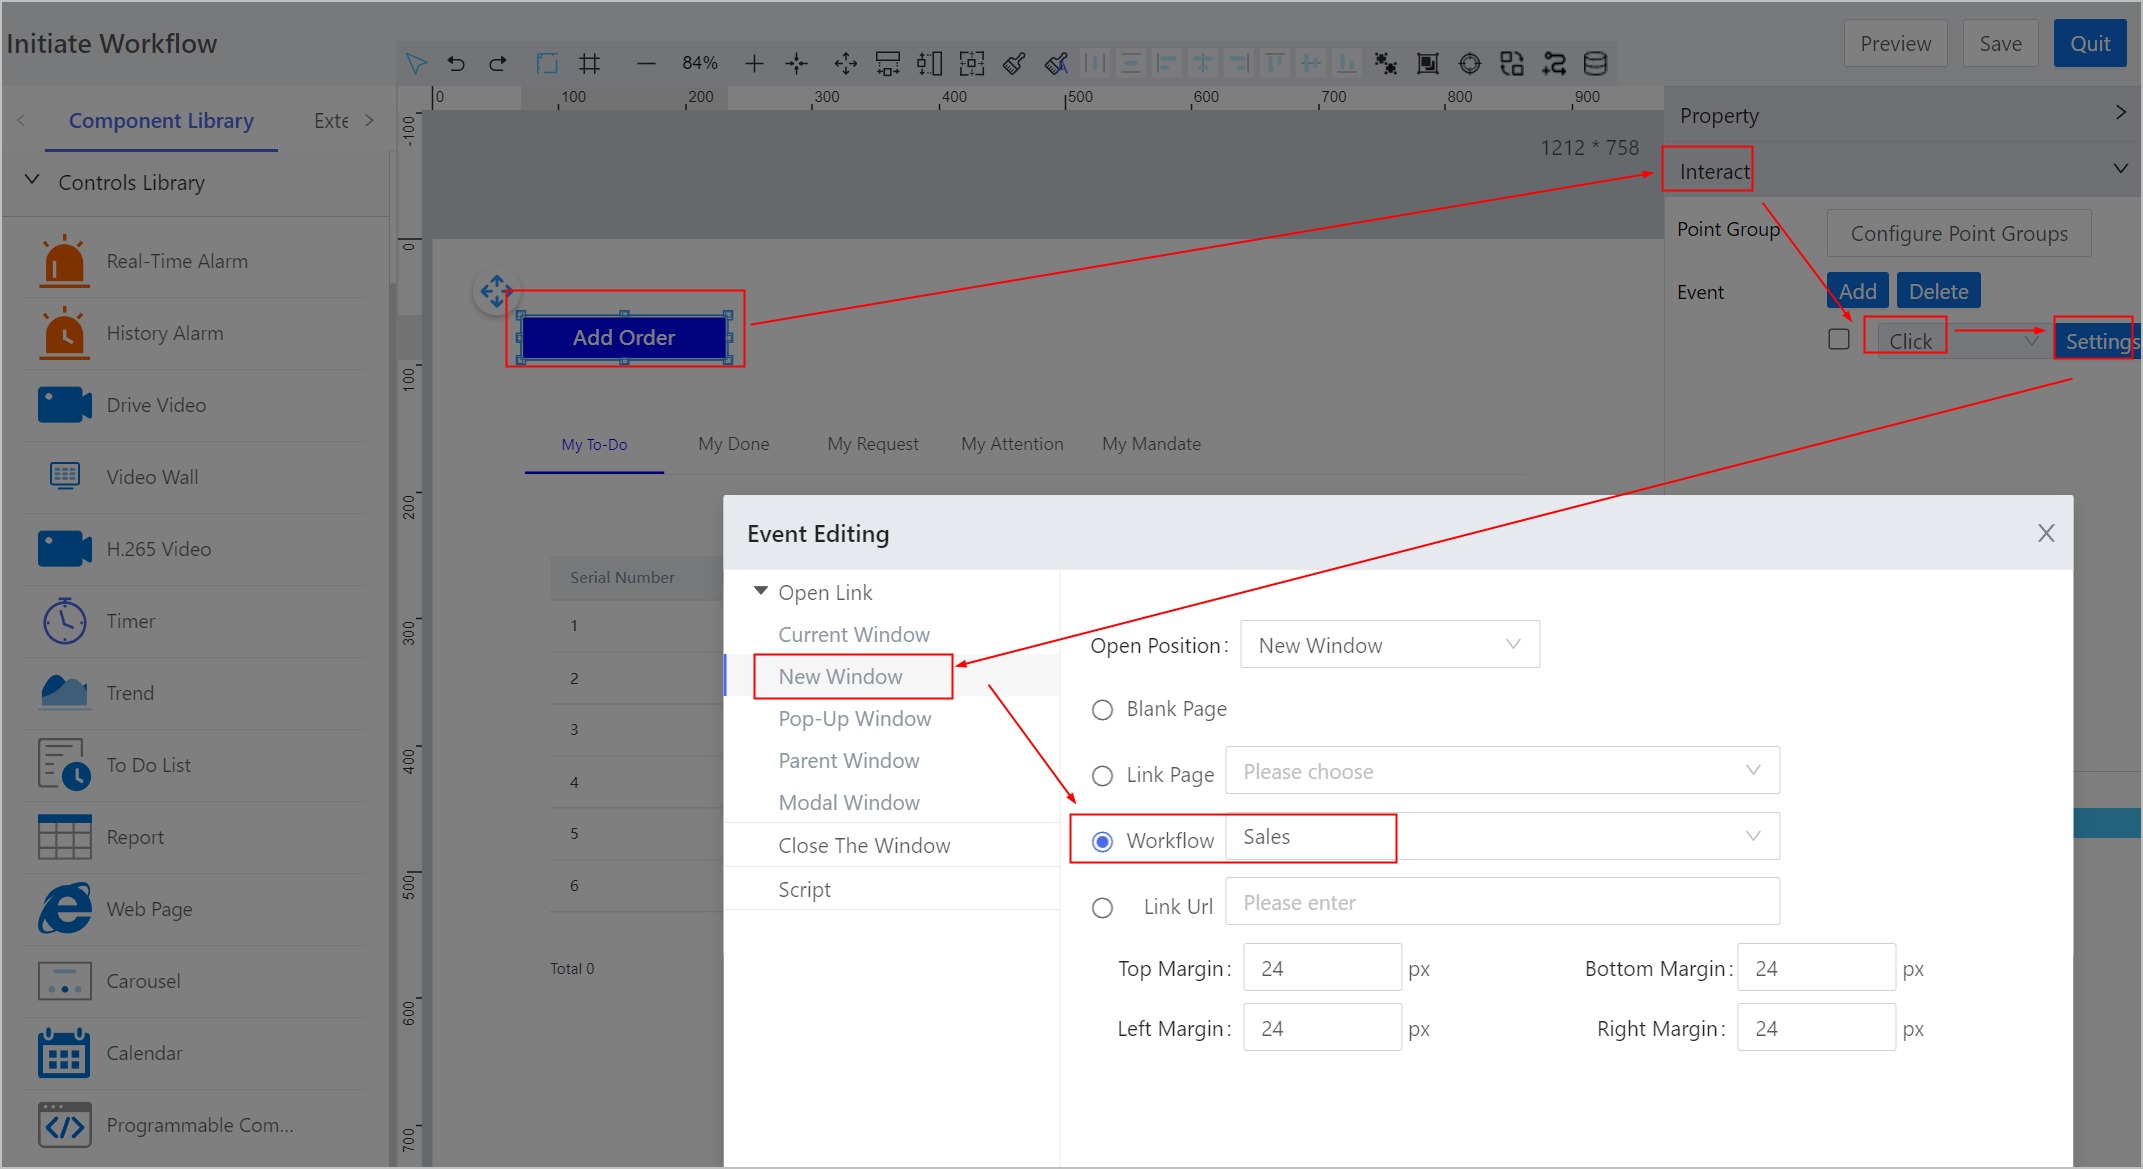
- Add a button and a to-do list on the page, and then configure the button attribute as needed.
- Click Interaction on the right side, add a Single-click event to the button, and then click Setting to configure the event.
- Add the drawn workflow to the page.
- Click Finish.
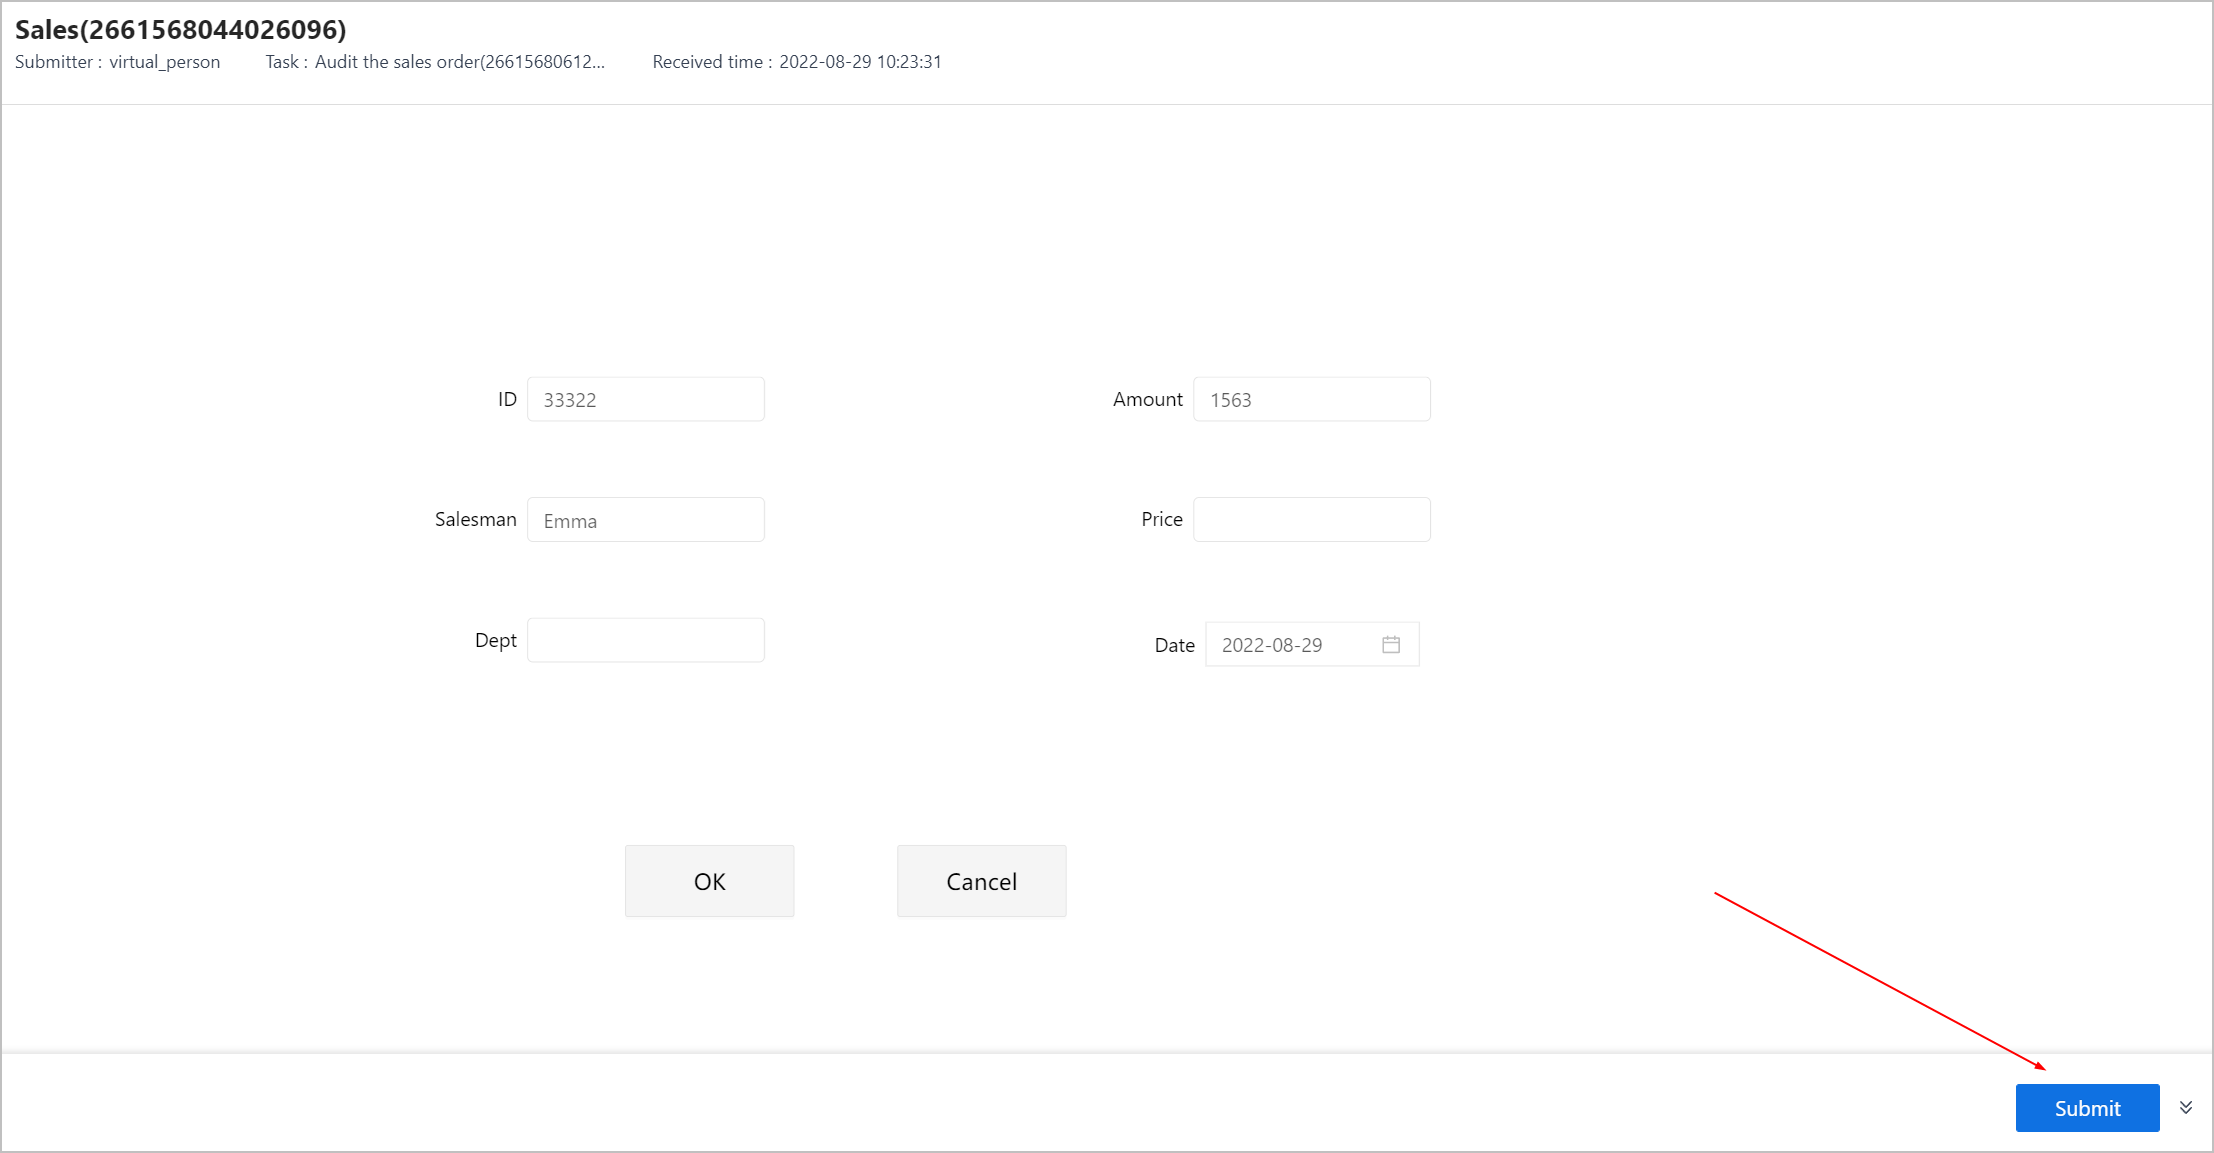
Running the Workflow
The running process is from an example.
- Inside the application, go to Interface Design to preview the workflow page.
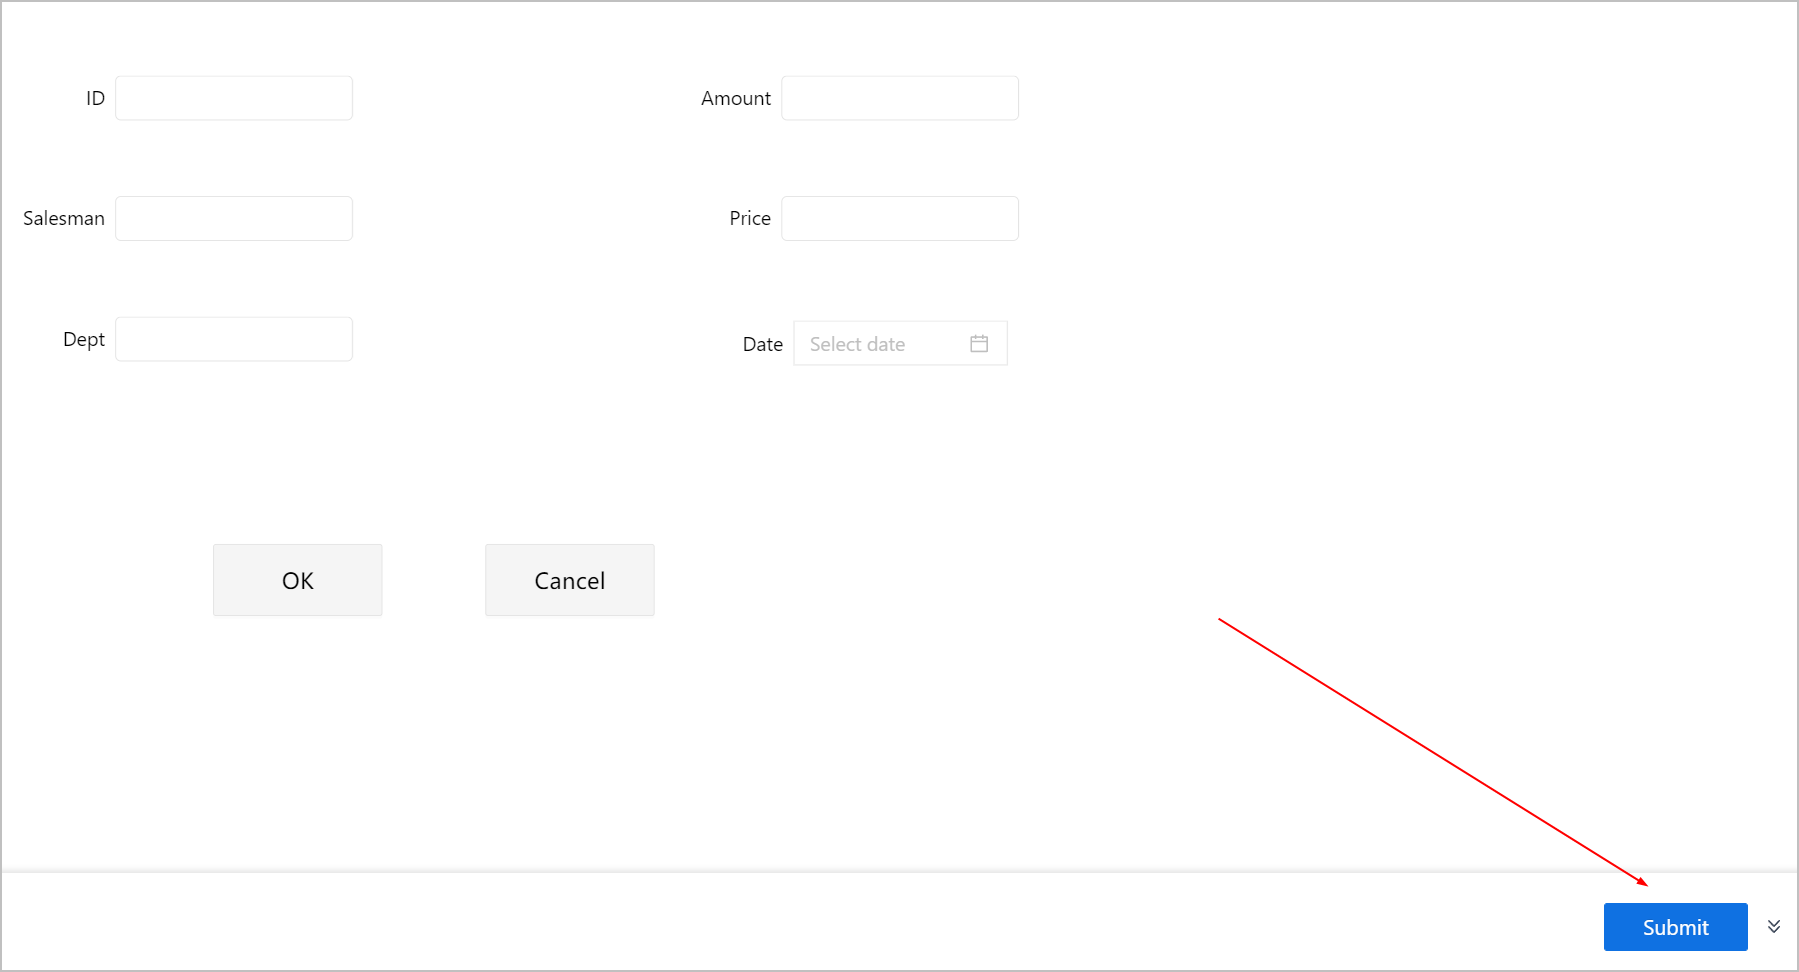
- Click the button, and you are directed to the bound page of this button.
- Enter the information as the workflow requires, and then click Submit.
- The page is redirected to workflow page, and a new record is added to the to-do list for approval.
- Click the first record, check the information and then click Submit.
If you have bound a service to add the approved data to the database, you can check the database to see whether the data is successfully added.